IKAN. TILTA CAMERA SUPPORT. RED EPIC. MIKE PECCI.
Read moreLIGHTING: USING SPEEDLIGHTS
Last month I had an accident that almost took my life.
While attempting to ice skate for the first time, I tripped, fell and cracked my skull open. It turned into an intense life experience that set me on a wild adventure through the medical system and a month long recovery. As you can guess, by the third week of doing nothing I was going nuts! I had all these new ideas, and inspirations just clambering their way out of the crack in my skull. I needed to shoot!
Before the accident, I spoke with the awesome folks at Lumo Pro. They wanted to send over a few of their LP 180 Manual Flashes for me to test. So I had new gear, new lighting ideas, and a free Sunday to work with fellow photographer Gina Manning. Perfect!
Manning and I wanted to really put the strobes to the test. As a challenge, I wanted to see how many different looks we could get in one room with only two speed lights. We made some rules:
- No makeup
- No wardrobe changes
- Two lights
- Two stands
- Handful of gels
- Two reflectors
- Umbrella
- Snoots
I do my best work when dealing with restrictions. Overcoming obstacles helps me come up with ideas that I could never preconceive. I find myself in this position on jobs all the time honestly; it is a lot more fun!
In 2012 I taught myself how to use speedlights. Before that, I was lighting my photographs the same way I light my films - constant light sources. That forced me to shoot at high ASA, creating heavy grain. A photographer friend of mine suggested I try speedlights, so I got my hands on a few Nikon SB800’s. At the time, they were top of the line and had a lot of great features - Almost too many! They seem focused on TTL shooting, which to me seemed like a complicated way to cheat. I had to dig deep to figure out how to use them manually and the entire time I kept wishing they were just simpler to use. I started researching Nikon’s smaller units, but only the SB800 and SB900 can work with wireless control. So in order for me to use the wireless setup I have to spend $400 – $500 dollars per speedlight. Sure I would cough up $500 for my Key light, but I usually shoot with at least 4 lights and spending all that loot on edge lights is ridiculous.
In the current state of the photography business it is getting harder and harder to get paid the fair amount for a gig. The only way I can survive is by keeping my overhead down. That means finding a more affordable lighting solution.
Enter Lumo Pro. I stumbled across their speedlights on Ebay. For $200 I can get a reliable light source that can be triggered via wireless, and it’s all manual! I couldn’t wait to get my hands on them!
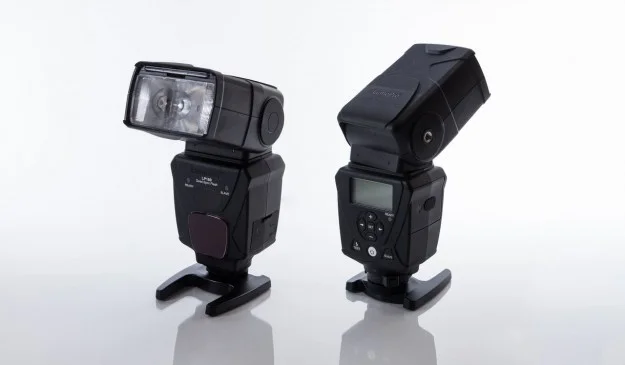
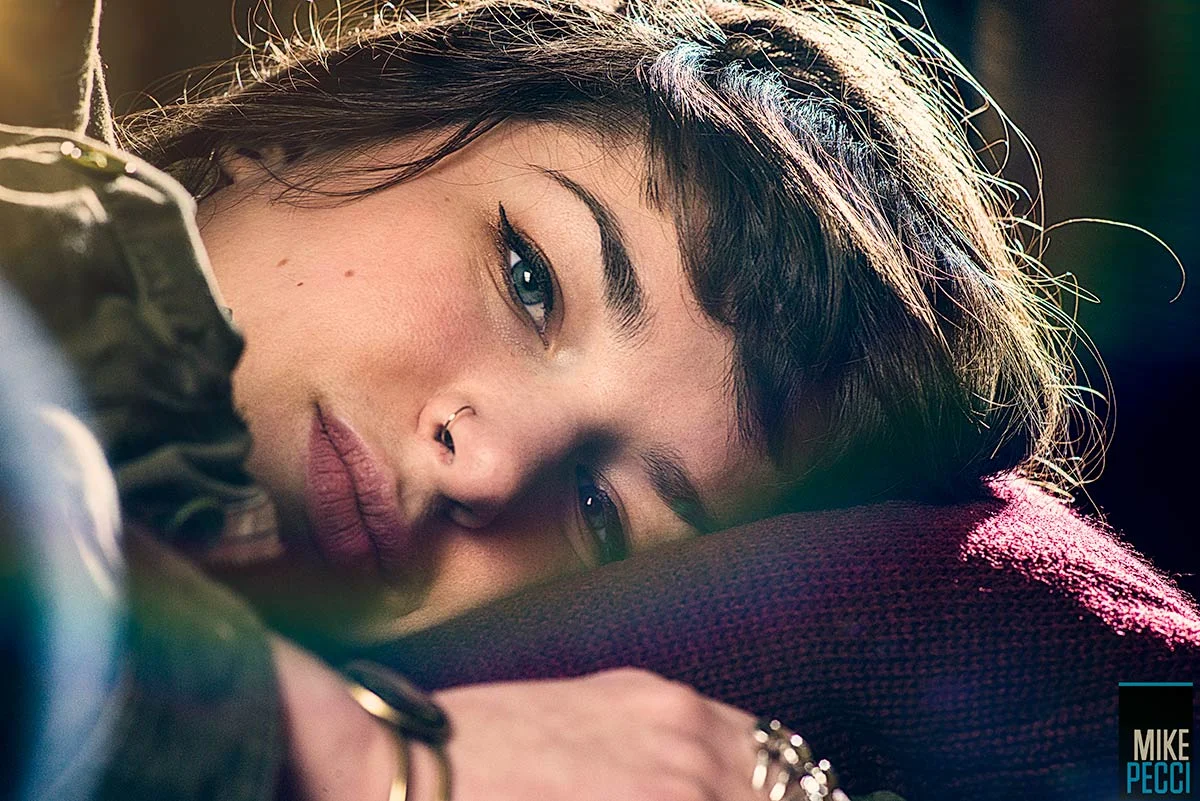
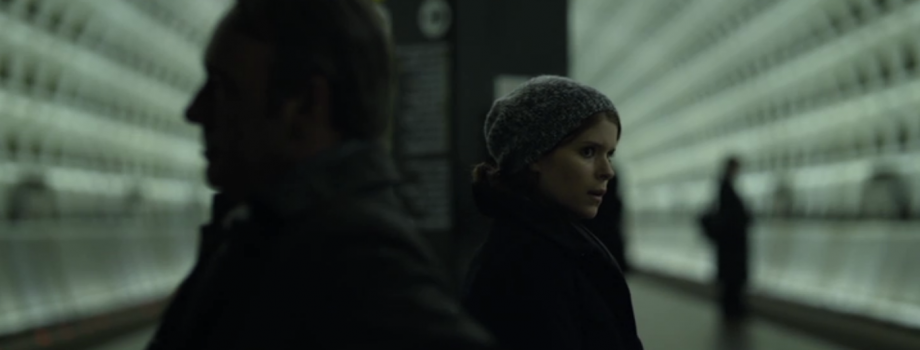
I unpacked two of them and mounted them on C-Stands for maneuverability, while Gina picked out colored gels. Lately I have been obsessed with under lighting subjects. I am a huge fan of the cinematography used in House of Cards and Hannibal. Barely lit faces and dark silhouettes cut by under-exposed backgrounds. I wanted to recreate those looks with the strobes.

I started by using the window (daylight) as my key and the Lumo’s as edge lights and fill. Shooting at about 1/64 power, they worked perfectly. Flashed every time!
I decided to change it up a bit and blow out my edge light. I cranked them up to the highest setting and found the units first obstacle. Shooting at Power: 1/1 it takes the flash about 5 seconds to recharge. Not really a huge issue for shooting still life, but if you needed to capture action at high shutter speeds and require a big output from your flash, it could be a problem. Waiting for it to recharge between shots could cause you to miss the action. Once I reset it to a lower output, it refreshed as quickly as my camera did.
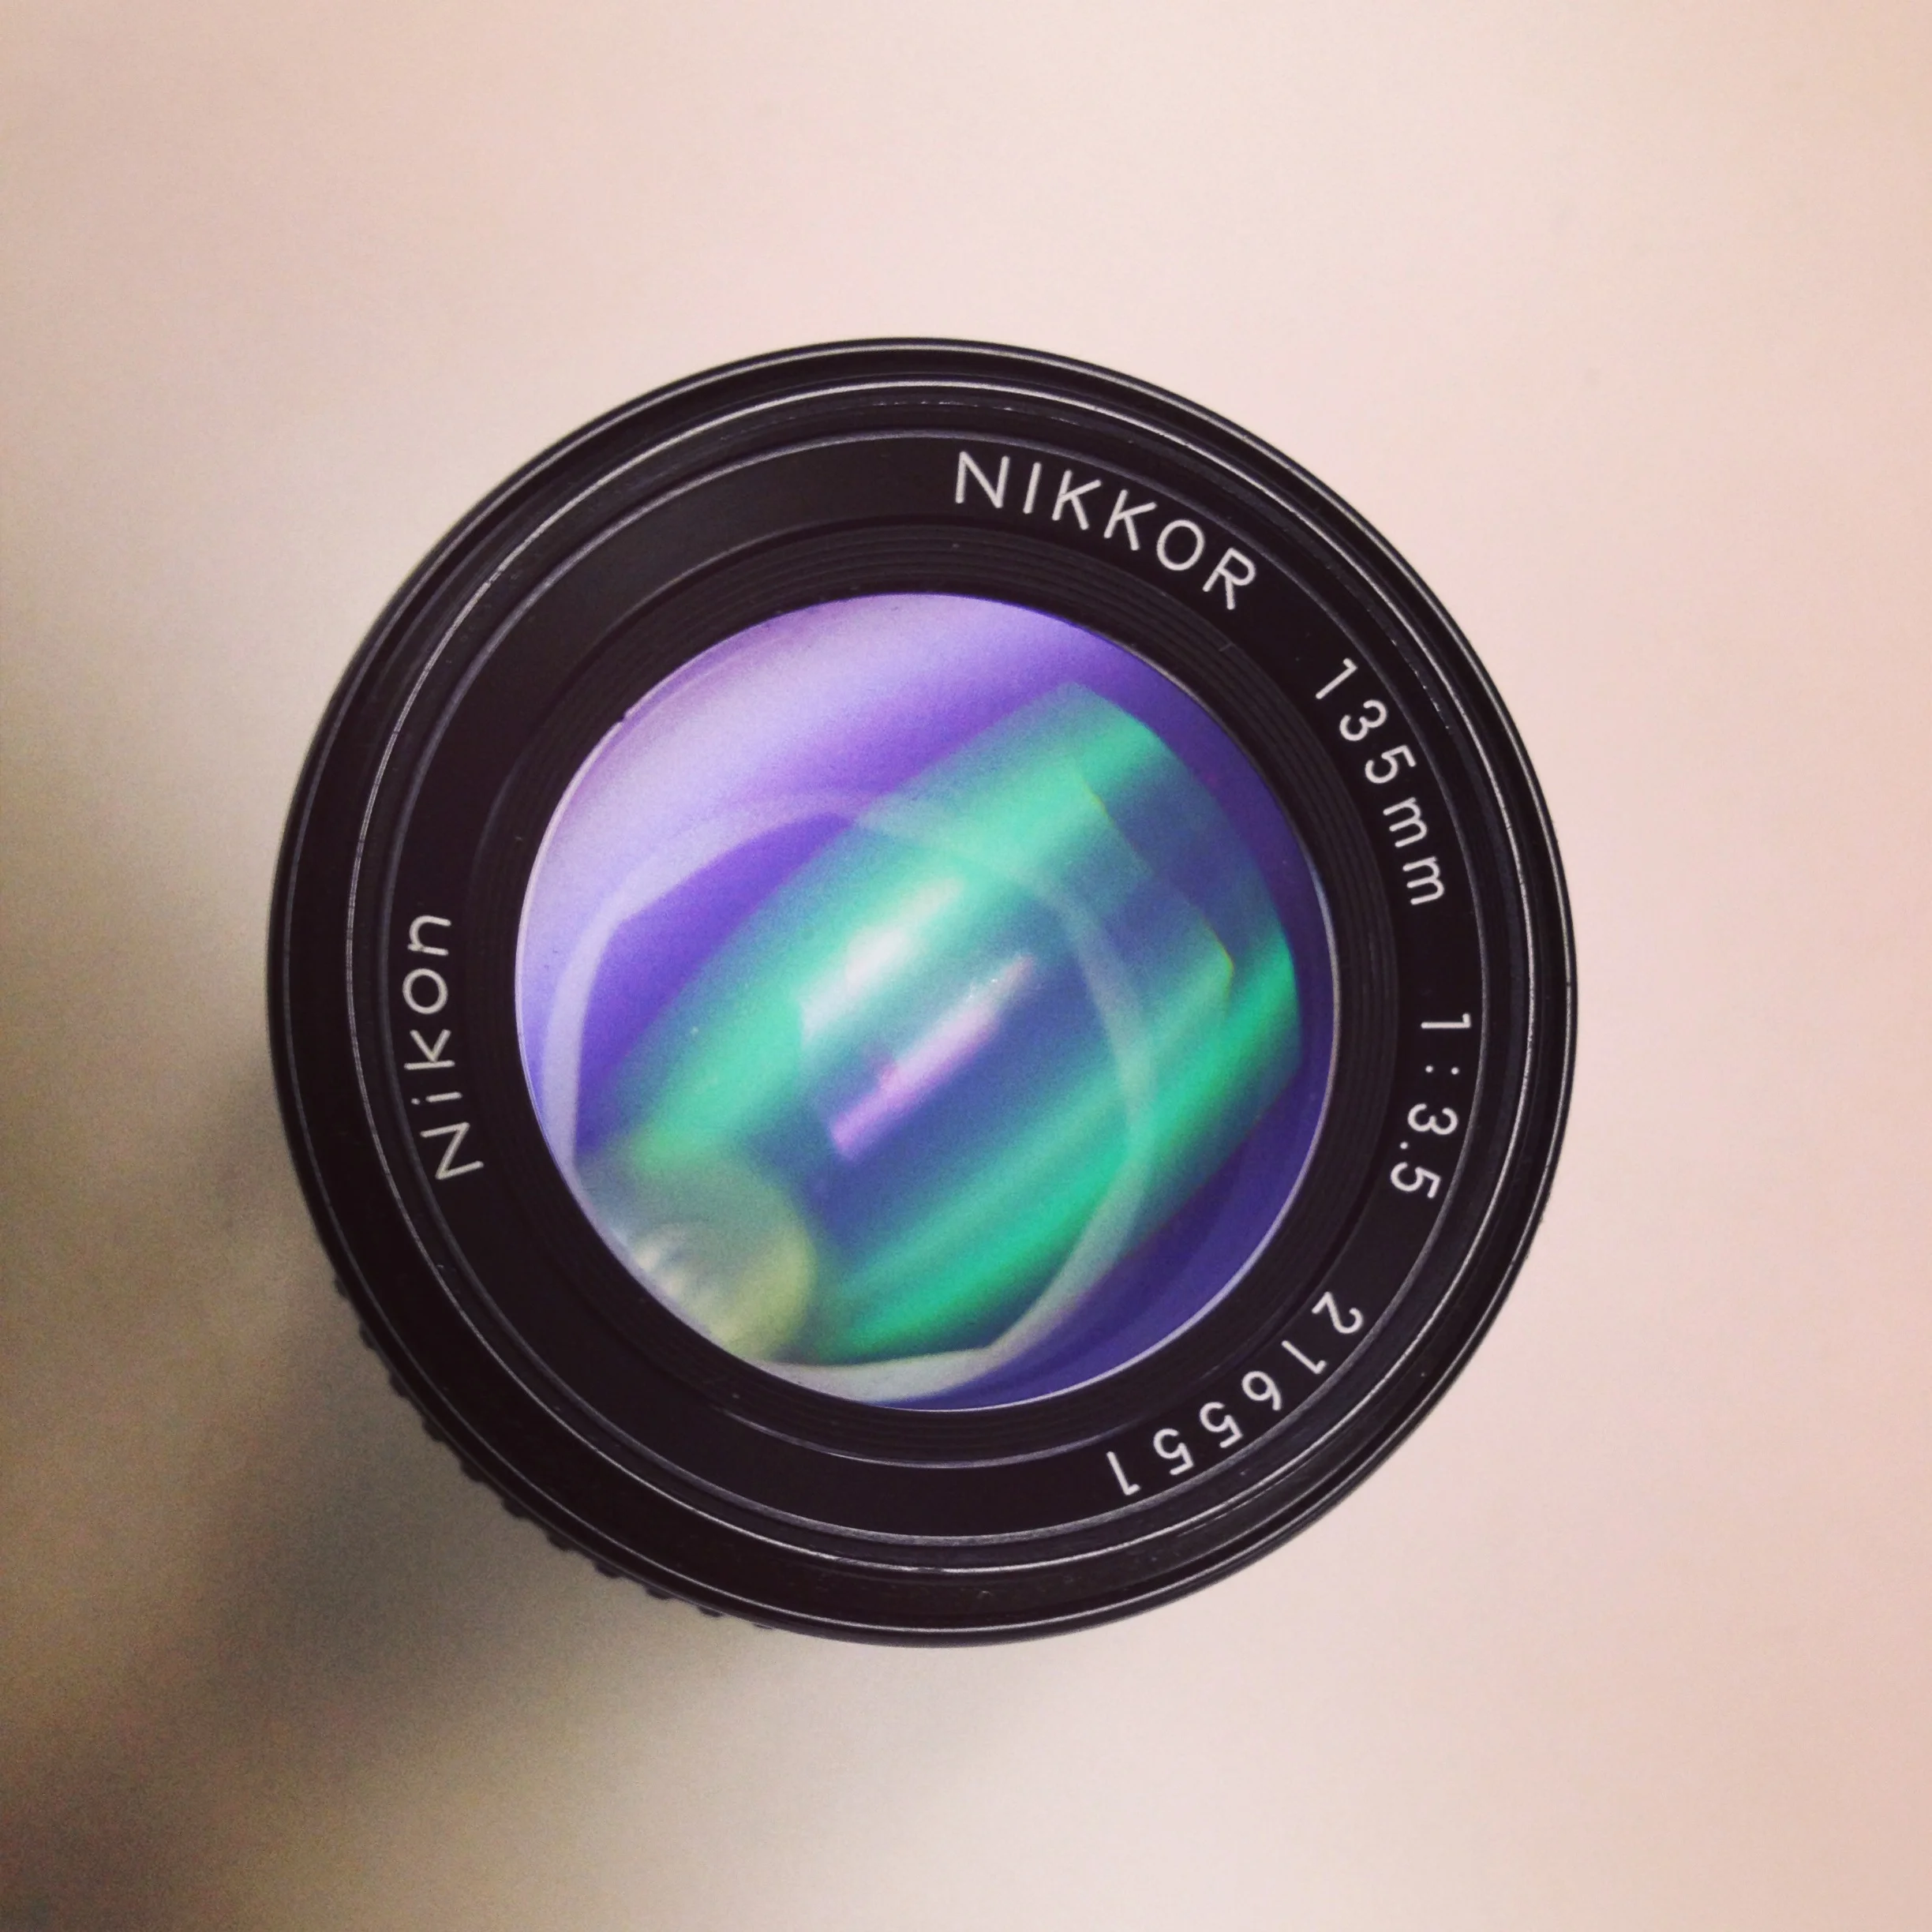
Another piece of gear we tested was a used Nikkor 135mm T3.5 lens. I got this puppy basically for free with a $50 gift certificate to a local camera shop. I needed a better portrait lens, and sure the 3.5 t-stop is a turn off, but I figured ‘what the hell. ‘
Paired up with the Lumo’s, I was able to capture some gorgeous shots at 150 ISO! The old lens captured this beautiful de-saturated color and beautiful lens flaring.
Next up was the low lighting test.
I have yet to be impressed with the light manipulators in the photo world. The soft boxes and umbrellas always seem flimsy and too thin. I definitely need to play with some options. I usually fall back on my cinematography techniques; bouncing light off bead boards, muslin, or reflectors. I had my assistant make me a bunch of custom made snoots that fit snugly on speedlights for control. They range in length with a black end and a white end for more spread. Some are even stuffed with a black honeycomb to give the light a pinpoint focus.
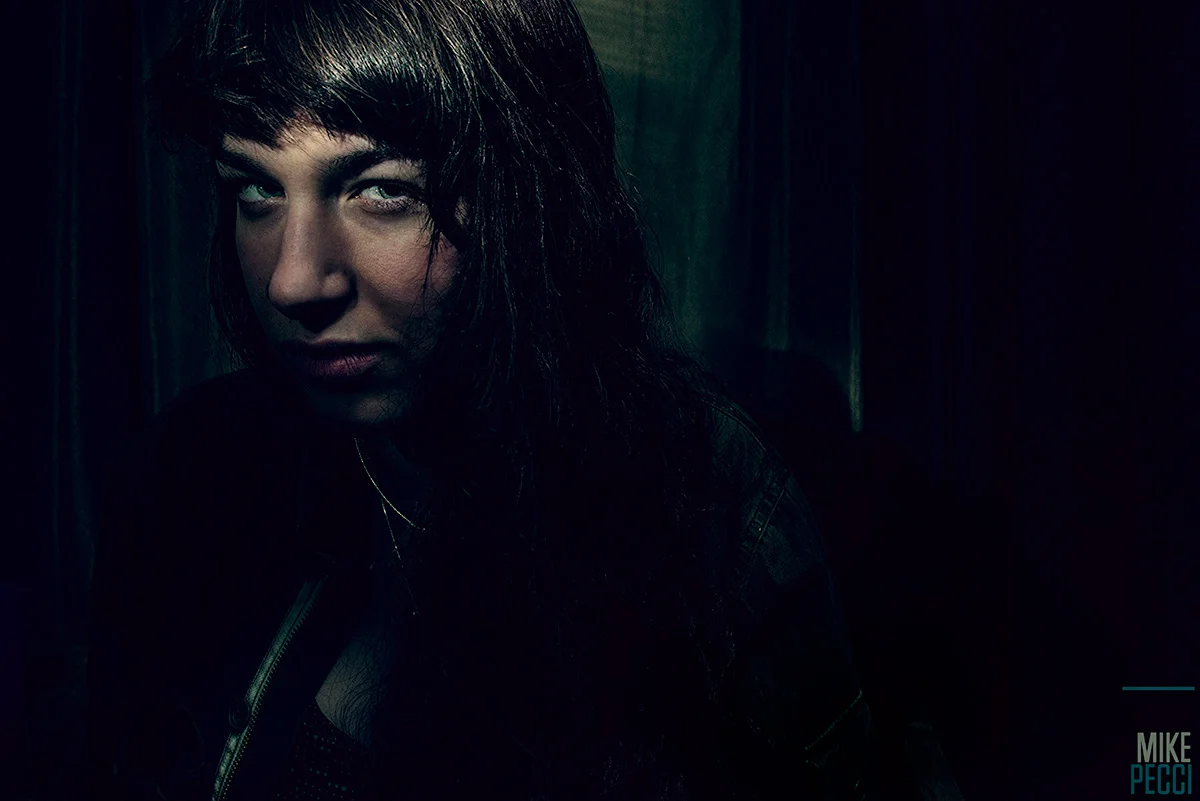
For these shots, I used the two Lumo’s. One with a long snoot focused on Gina’s face, the other was being shot through two layers of diffusion and an umbrella to give the shadows some detail. The sun was going down behind the curtain and blinds giving awesome texture to the fabric but was quickly disappearing. I had to get the shots fast!

Both Gina and I shot non-stop for at least 5 hours and the Lumo’s performed perfectly on one set of battieries. Pretty awesome for a $200 speedlight and a great addition to my kit!
- Mike Pecci
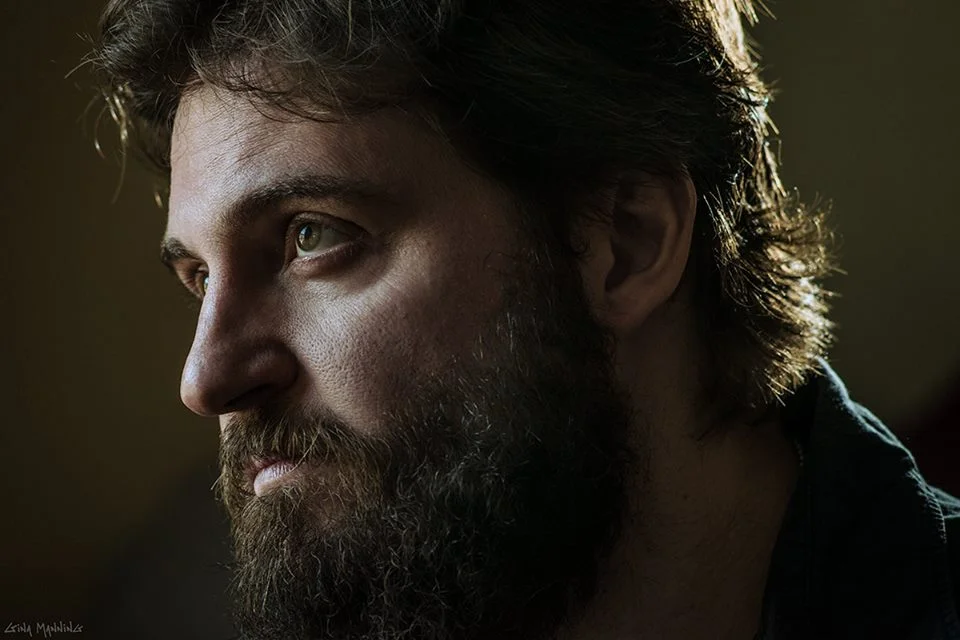
Gina took one of the best portraits ever shot of me! Follow her on facebook: Gina Manning Photography.
Follow Mike Pecci on Twitter/INSTAGRAM/Facebook
SHOOTING UNDER THE GUN.
SHOOTING UNDER THE GUN.
by filmmaker Mike Pecci
As the cinematographer for a documentary, being able to think creatively during high stress situations is key. This means doing your homework. Making a visual rulebook for the film that keeps you focused and gives you the ammunition to say no to a desperate director and sell them on something even better. You will be trying to find the best shot under the tightest time constraints, and you can’t be afraid to be constantly searching, constantly tweaking, to make the film better.

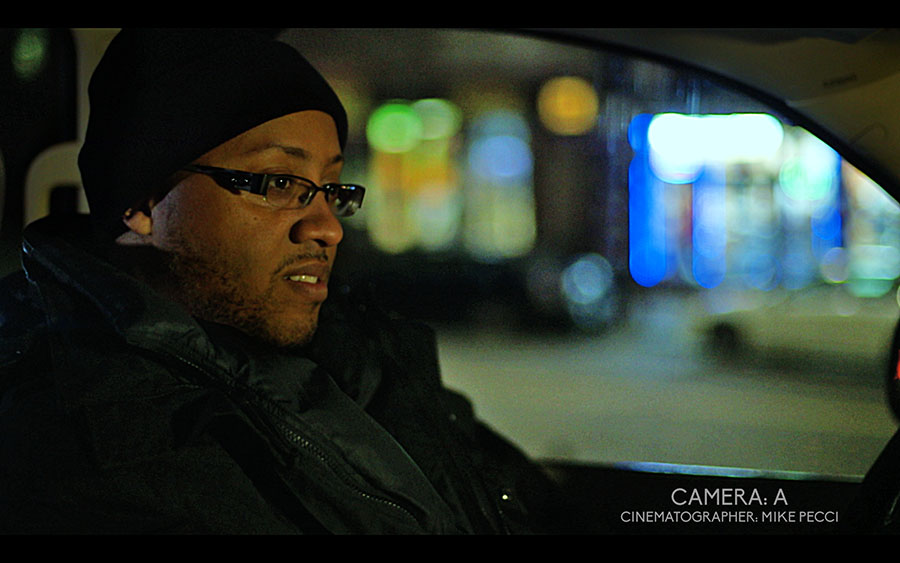
It’s 7:00PM on a random Tuesday in the middle of a bitter New England October. Our tiny film crew is jammed into a cramped storefront, which at first glance looks like it should be condemned, but as it turns out makes some of the best Jamaican food in the city. The team, covered in layers of wool socks, long underwear and fingerless gloves, searches for the courage to go back into the freezing temperatures. Rudy Hypolite, the director, bursts into the room. “I know this isn’t part of the plan, but we have a chance to interview one of the street workers right now. This is our only chance. Can we do it here?”

I nervously look around the storefront. Every angle is terrible for camera, the sounds of the kitchen is bad for sound, and honestly it looked just plain boring. I grab our handler, a local to the neighborhood who keeps us from getting into bad situations, and burst out onto the busy night street. Dorchester Avenue is bustling and jammed with after-work traffic and screaming cop cars. Nights in Boston go pitch black this time of year, so any exterior shots require a practical source like a street light or maybe the neon glow from the barber shop down the street. “That shop is owned by my cousin”, says the handler. I look at Rudy and ask “How long do I have?” Thirty minutes till we roll camera! I put my radio earpiece in my ear and start barking gear orders to my crew as we run two blocks down the street and burst into this busy barbershop. As I push into the shop I am greeted by a group of regulars staring at me questionably. “He’s not a cop!” says my handler and the whole place lets out a sigh of relief. He then focuses on convincing his cousin to let us shoot in the shop as I scour the location for shots. I mentally pull up our visual rulebook and run through my checklist.
· No glamorizing the life.
· No slow motion.
· The interview master needs to be from the third person perspective.
· The coverage will be an extremely tight close-up
· The location must be as big of a character as the interviewee
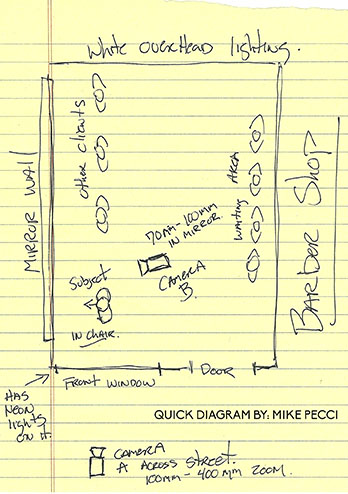
The trick is finding a place with enough room for both cameras that will be shooting with telephoto zoom lenses. I also need room to hide lights from each shot. My first thought is that I could sit him in this chair in front of this window and shoot from outside across the street….
Our handler interrupts me. “We can’t shoot in here.”
Well hell, now what? I need a spot that is quiet, immersed in the neighborhood, and looks cool. What does our subject do? He is a street worker. He drives around and patrols his streets all night. Oh wait! In a car! The production cars are parked on a slightly elevated hill under a light in the church parking lot across the street. If I park it at the right angle I can see all the headlights, red taillights, and storefront out of focus behind the subject. It’s perfect! I start redirecting the crew over radio as we run across two lanes of blaring traffic horns. We have found our spot!
The countdown clock begins; We have 20 minutes till we roll.
Our camera operator Anthony Jarvis and assistant Tony Fernandez start pulling out the camera rigs. The camera kit includes:
· A Cannon C300 (Camera A) that we have tweaked the color and gamma setting on for night shooting.
· A Cannon 5D (Camera B) that we use for coverage and have built out for quick handheld situations.
· Cannon 100mm – 400mm
· Cannon 70mm – 200mm
· 1 kit of various wide and portrait lenses
· Heavy duty tripods.

Camera A’s setup is going to be a profile shot through the passenger widow of the subject talking to the interviewer (in the back seat) through the rear view mirror. The windows in the truck will have to be up to both help with sound but to also drive home this “third person perspective” that we designed for the film. We will through the 70mm to 200mm lens on it so that the operator can zoom and change up the shots slightly for the edit in between questions. It’s important to think not just about the images, but also understand how a scene can be edited when shooting a doc like this. We use the C300 because that shot requires a more sensitive sensor on the camera, so we crank up the ISO to get a great exposure of the traffic and street life in the background. The C300 is amazing in low light situations and its noise reduction feature really helps you control image noise when shooting in the darkest situations. The shot also needed as much light as possible because I constantly want to shoot at higher shutter speeds to get rid of the annoying ghosting that video tends to have.

Camera B, with a 24mm wide lens, will be nestled right at the bottom of the truck hood shooting through the windshield. Tony finds an angle that frames the subject wide and at the left side of the frame. This keeps the interviewer out of the shot and includes the traffic on the street. The 5D picture settings have been tweaked to match the C300 as closely as possible. I’ve never been a fan of the 5D, I feel like it’s clunky, the menus are annoying and it still stops recording after 12 minutes. I would normally choose the Nikon D800 but we wanted to match Cannon with Cannon. Looking at the rough shot with a calibrated field monitor from Ikan showed that it would require more fill light from this angle, which is fine because it would act as a stronger edge light for the primary shot.

For lighting we had a bunch of toys from IKAN. Watch us unpacking some of the lights: https://vimeo.com/83801840
Our package included:
· 3 1x1 Bicolor LED Units (with batteries) (IFB1024 Featherweight Bi-color LED Light )
· 2 On camera LED units (with batteries) (ILED 144 Bi-color Flood Light )
· 2 iLED312 LED units (with batteries)(ILED312-v2 Bi-color Flood Light )
· 1 roll of hand picked color gels and diffusion's.
· A hand full of suction cups.
· And a tiny pocket LED flashlight (that was an impulse buy at Work’n Gear).
Once we set the general exposure, running Camera A at about 28,000 ASA, the trick was using the smaller LEDs dimmed way down to light the subject. LEDs tend to give off a very “hard light.” That works really well for edging a subject, but for key and fill we would have to either bounce them or push the light through diffusion. Two medium sized LEDs were used for key lights. One next to Camera A, pumping through the side window as fill for the profile, and the other beaming in through the windshield for the key on Camera B. The subject needed a back-light that would help define the interior of the car and pull the interviewee off the background, however it had to stay out of Camera B’s shot and not be blocked by the interviewer. I threw it on a suction cup and popped it up on the trucks back window beaming toward the back of the subjects seat. It worked as a great back-light for Camera B, but the head rest on the drivers seat was way too high and prevented the light from hitting the subjects head in Camera A’s position. The subject still looked like he was bathed in darkness, which made him feel way to sinister and manipulated for the story. I grabbed the little pocket pen LED light, wrapped some diffusion around it and crammed it into the crevice behind the actors head. It gave him a perfect edge and beautiful skin definition. Camera A was done and lit with about 4 minutes to go!
Camera B still needed more work.
The sensor in the 5D wasn’t strong enough to get an exposure on the hood of the car leaving a lot of black space in the frame. I pulled out a 1X1 LED and tried some direct lighting on the dark hood. It sucked up almost all of the light and looked unnatural, so I turned the unit around and shot it at the 5D lens. This caused a vibrant lens flare that began on the dark side of the frame. Not only did it make the shot interesting to look at, but also the light bouncing in the lens washed out the blacks a bit, bringing out some more detail.

We were lit! All running on battery!
The main shot is gorgeous with stunning out of focus plumes of white and red lights (and frequent flashing police strobe) from the traffic. The second shot places our subject in the world that supported his story.
The interview was amazing because our subject felt comfortable enough to get lost in a story about his childhood and his mother. Keeping the crew outside the car was the perfect situation for the interviewer and subject to focus. The camera crew had their eyes locked on our IKAN monitors the whole time, entranced by the night lighting and random flares. I was proud that we were able to pull it off - scouting, conceiving two camera shots and lighting - in 30 minutes!
That’s documentary film-making!
GETTING YOUR STYLE SHOT QUICKLY

Getting your style shot quickly.
By Mike Pecci
The challenge over the past few projects has been to make sure my visual style can be done quickly. One was a commercial for the Boston Celtics directed by McFarland & Pecci and the other was promotional material for my upcoming sci-fi web series. Both required a tiny crew, minimal gear, and for us to shoot as fast as possible.

Posted on the Celtics instagram

Ian and I were hired to direct a new TV spot showcasing the new team for the Boston Celtics. The client wanted high contrast portraits of the players on a white background and they had designed a specific look in mind. It was left up to us to add life to the shots and try to convey a hard working and “driven to succeed” vibe from each of the players. The challenge was shooting the athletes during press day, which meant we were set up in the team’s practice gym with a dozen other production crews and news outlets covering the event. We had a small space, 20ft x 20ft – couple that with the fact that we only had each player for 10 to 15 minutes.

The lighting in the gym was definitely going to be a problem and we were unsure if the halogens would pulse while shooting at high frame rates. We had to build a tent for the set. Anytime you start dealing with 20x black out gear and larger grip equipment it means you have to add more men to the crew just to tackle lifting. Jason and Tom at Quixote helped me design a package that could be handled by 4 people. It’s harder than you think. Filming the players on a white background also proved to be a challenge based on the fact that these are pro basketball players, the shortest being 6’ and the tallest 7’. Giving these men room to move around and dribble isn’t easy in a tight space. The longest white seamless you can buy is 13FT long and we needed it to be it at least 15 feet tall to work.

Lighting in the tent was a bit of a process. Firstly, real estate was scarce and we wanted as wide of an angle as possible for some shots. Using wide-angle lenses was an issue because we didn’t want to see the edges of the seamless, so the widest we could shoot with was a 25mm and that required the player be a certain distance from the camera. You also don’t want the player right up against the background so he isn’t affected by the backdrop lighting. So the 20ft was gobbled up pretty quickly. We were also provided with a certain amount of power that we had to run all of the lights, the video gear, monitor, and charging station. This meant we were looking at LED and Kino units.


We got three 4ft Kino banks to light the background. They are the perfect choice for a soft light that falls off quickly. That helped us contain spill. To light the players, I used the IKAN IFB1024 LED panels on battery power. They are dimmable, and have the ability to change color temperature with the twist of a dial. They are also incredibly lightweight so I was able to have a technician on each unit and move them quickly to sculpt the light on a player’s face. That was essential because we only had each player for about 10 minutes! That included the hello, explanation of what we were doing, lighting, and camera adjustment. Add to all of that the list of actions and lines of dialog we wanted to capture. Needless to say it was stressful! I was determined to make each shot look like one of my photographs and spent most of my time at the monitor shouting out brightness values and light positions to the crew. The final piece was going to be black and white, so we dialed in the monochrome setting on the VX17e IKAN 17 inch location monitor.


The results were great, and when you watch the spot you can definitely see our style. We couldn’t get our hands on the edit or the color grading for the piece, but that happens sometimes in advertising. The post is out of our hands.

My next adventure was a last minute promotional shot for my new Sci-fi project. One of the lead actors (Nick Apostolides) was in town last minute and I figured it was a perfect opportunity to shoot a photo for the promo packet. We jumped into action trying to find a last minute location. For the shot, I wanted a high-rise view of downtown Boston at night, and Nick would be standing in front of a large glass window staring at his own reflection. Where the hell would we find that?!

I spent a few hours on the phone with hotels in the area but everyone was booked. Turns out that it’s convention time in the city. Shit! So I changed strategy and reached out to real estate agents, asking for lofts or condos in the financial district. Most were not helpful, especially when they heard that I had no budget, but one nice agent in particular gave me the insider scoop on a brand new building in Chinatown. He told me to call up the building manager and see if he could help us out. It turns out that the building was called the Kensington, a brand new condominium building - and it is gorgeous! I spoke to Drew, the building manager, and he was completely accommodating. I expected him to need at least a day to figure sort it all out, but I was greeted with “We would love to help you out! Wanna come down right now?”


I called up Nick, grabbed a few pieces of gear, Tony came along, and we were there in 20 minutes. The timing was perfect too because the sun was going down. Drew hooked us up with our choice of penthouse apartments and we took the one with the best view. Tall light up office building right out of a Michael Mann movie! We only had about 25 minutes to get the shot before the building office closed so I had to be quick. I wanted to be portable so we brought along the IKAN LED 3 point light kit and the Nikon D-800. After hunting for the right angle on the glass window the next trick was exposing to the city ambience.


The sensor in the D-800 is great for low light and I was running it at about 800asa and wide open on the Nikkor 85mm 1.4 lens. We used two of the IKAN LEDs to illuminate the image. One was used to front light Nick so we would see his reflection, and the other to add a separation edge to his black suit. After some tweaking, the final shot came out fantastic! So good in fact that I switched the camera into video mode and shot the pieces I needed for a video promo and an animated GIF. The entire thing was shot, planned, and completed in three hours. Thanks to everyone who helped and if this is a sign of how this new series will go, we are in for something special.

TEST KITCHEN - LED's & LENSES

The Test Kitchen is something we do at McFarand & Pecci whenever we
have a spare moment. It’s an opportunity for us to test out new
techniques, gear, or shooting ideas and share it with the crew. This
time around we got a hook up from the lovely folks at Quixote Studio in
Boston and brought in some new toys to test. Nikon shipped us out some
fantastic new lenses and I fell in love with the Nikor 20mm lens. We
have a few projects coming up that require a lot of movement with
compact cameras so we wanted to see how the Nikon D800 would mount to a
specially rigged Zcuto cage. Ikan also let us test run their LED 1x1’s.
They are battery powered and have a sweet digital control panel on the
back allowing us to dial in specific brightness and color levels. They
also have remote controls that can work on all the lights or just
individuals. We wanted to see what sort of flares we got using them
with the lenses. Expect to see this stuff used on our next piece.
Check out some of the clips that we shot with a slight low contrast
setting and without and color grading. Drop me a line if you have any
specific questions.
PHANTOM CAMERA SHOOT
Here is a quick look at how we shot this vivid scene from The Dead Can't Be Distracted.
ANAMORPHIC ADAPTER TEST
Check out this quick clip where we test a LOMO 4x anamorphic lens on a Nikon D-700. We figured out accidentally that the lens was a 4X (Twice as wide as anamorphic) when it wouldn't un-squeeze correctly right. Wild stuff!